Tax Day Cheesecake, or, Double-Crusted, Lightweight Cheesecake

Alright, let's be honest. If you're reading this, there's a good chance you're paying American taxes today, which, even if you're getting money back, is still a terrible amount of paperwork. Or perhaps you're a Brit, in which case, you probably should be celebrating the fact that you AREN'T paying American taxes today. Or maybe you started a new job this week (oh wait, that's me).

Regardless, I'm pretty sure this accurately sums up the way you and I both feel right about now.

In case you're just tuning in, when I sorted out the recipes in the box, it turned out that my grandmother had over a dozen recipes for plain cheesecake. Plain! Not even flavoured! So each month I'm making one, in hopes that I'll perfect my method, and also that maybe eventually I'll have a go-to unbeatable cheesecake recipe. So far, this is turning out more difficult than I thought.

Of all the cheesecakes I've made from the box so far, this one is most definitely the easiest. It's also hands down the most delicious... but that doesn't mean it came out pretty. Once again, the cheesecake rose to unmanageable heights in the oven, then slumped, fell, and cracked down the middle almost all the way to the crust. Also, good luck finding zweiback if you don't live... wherever zweiback is from. I settled for a mix of BelVita 'milk & cereals' biscuits and something called 'Nice Biscuits,' which I later learned are very sweet and coconut-based, so I don't recommend going that route. But if you do, then lower your sugar accordingly (I've included both amounts below).

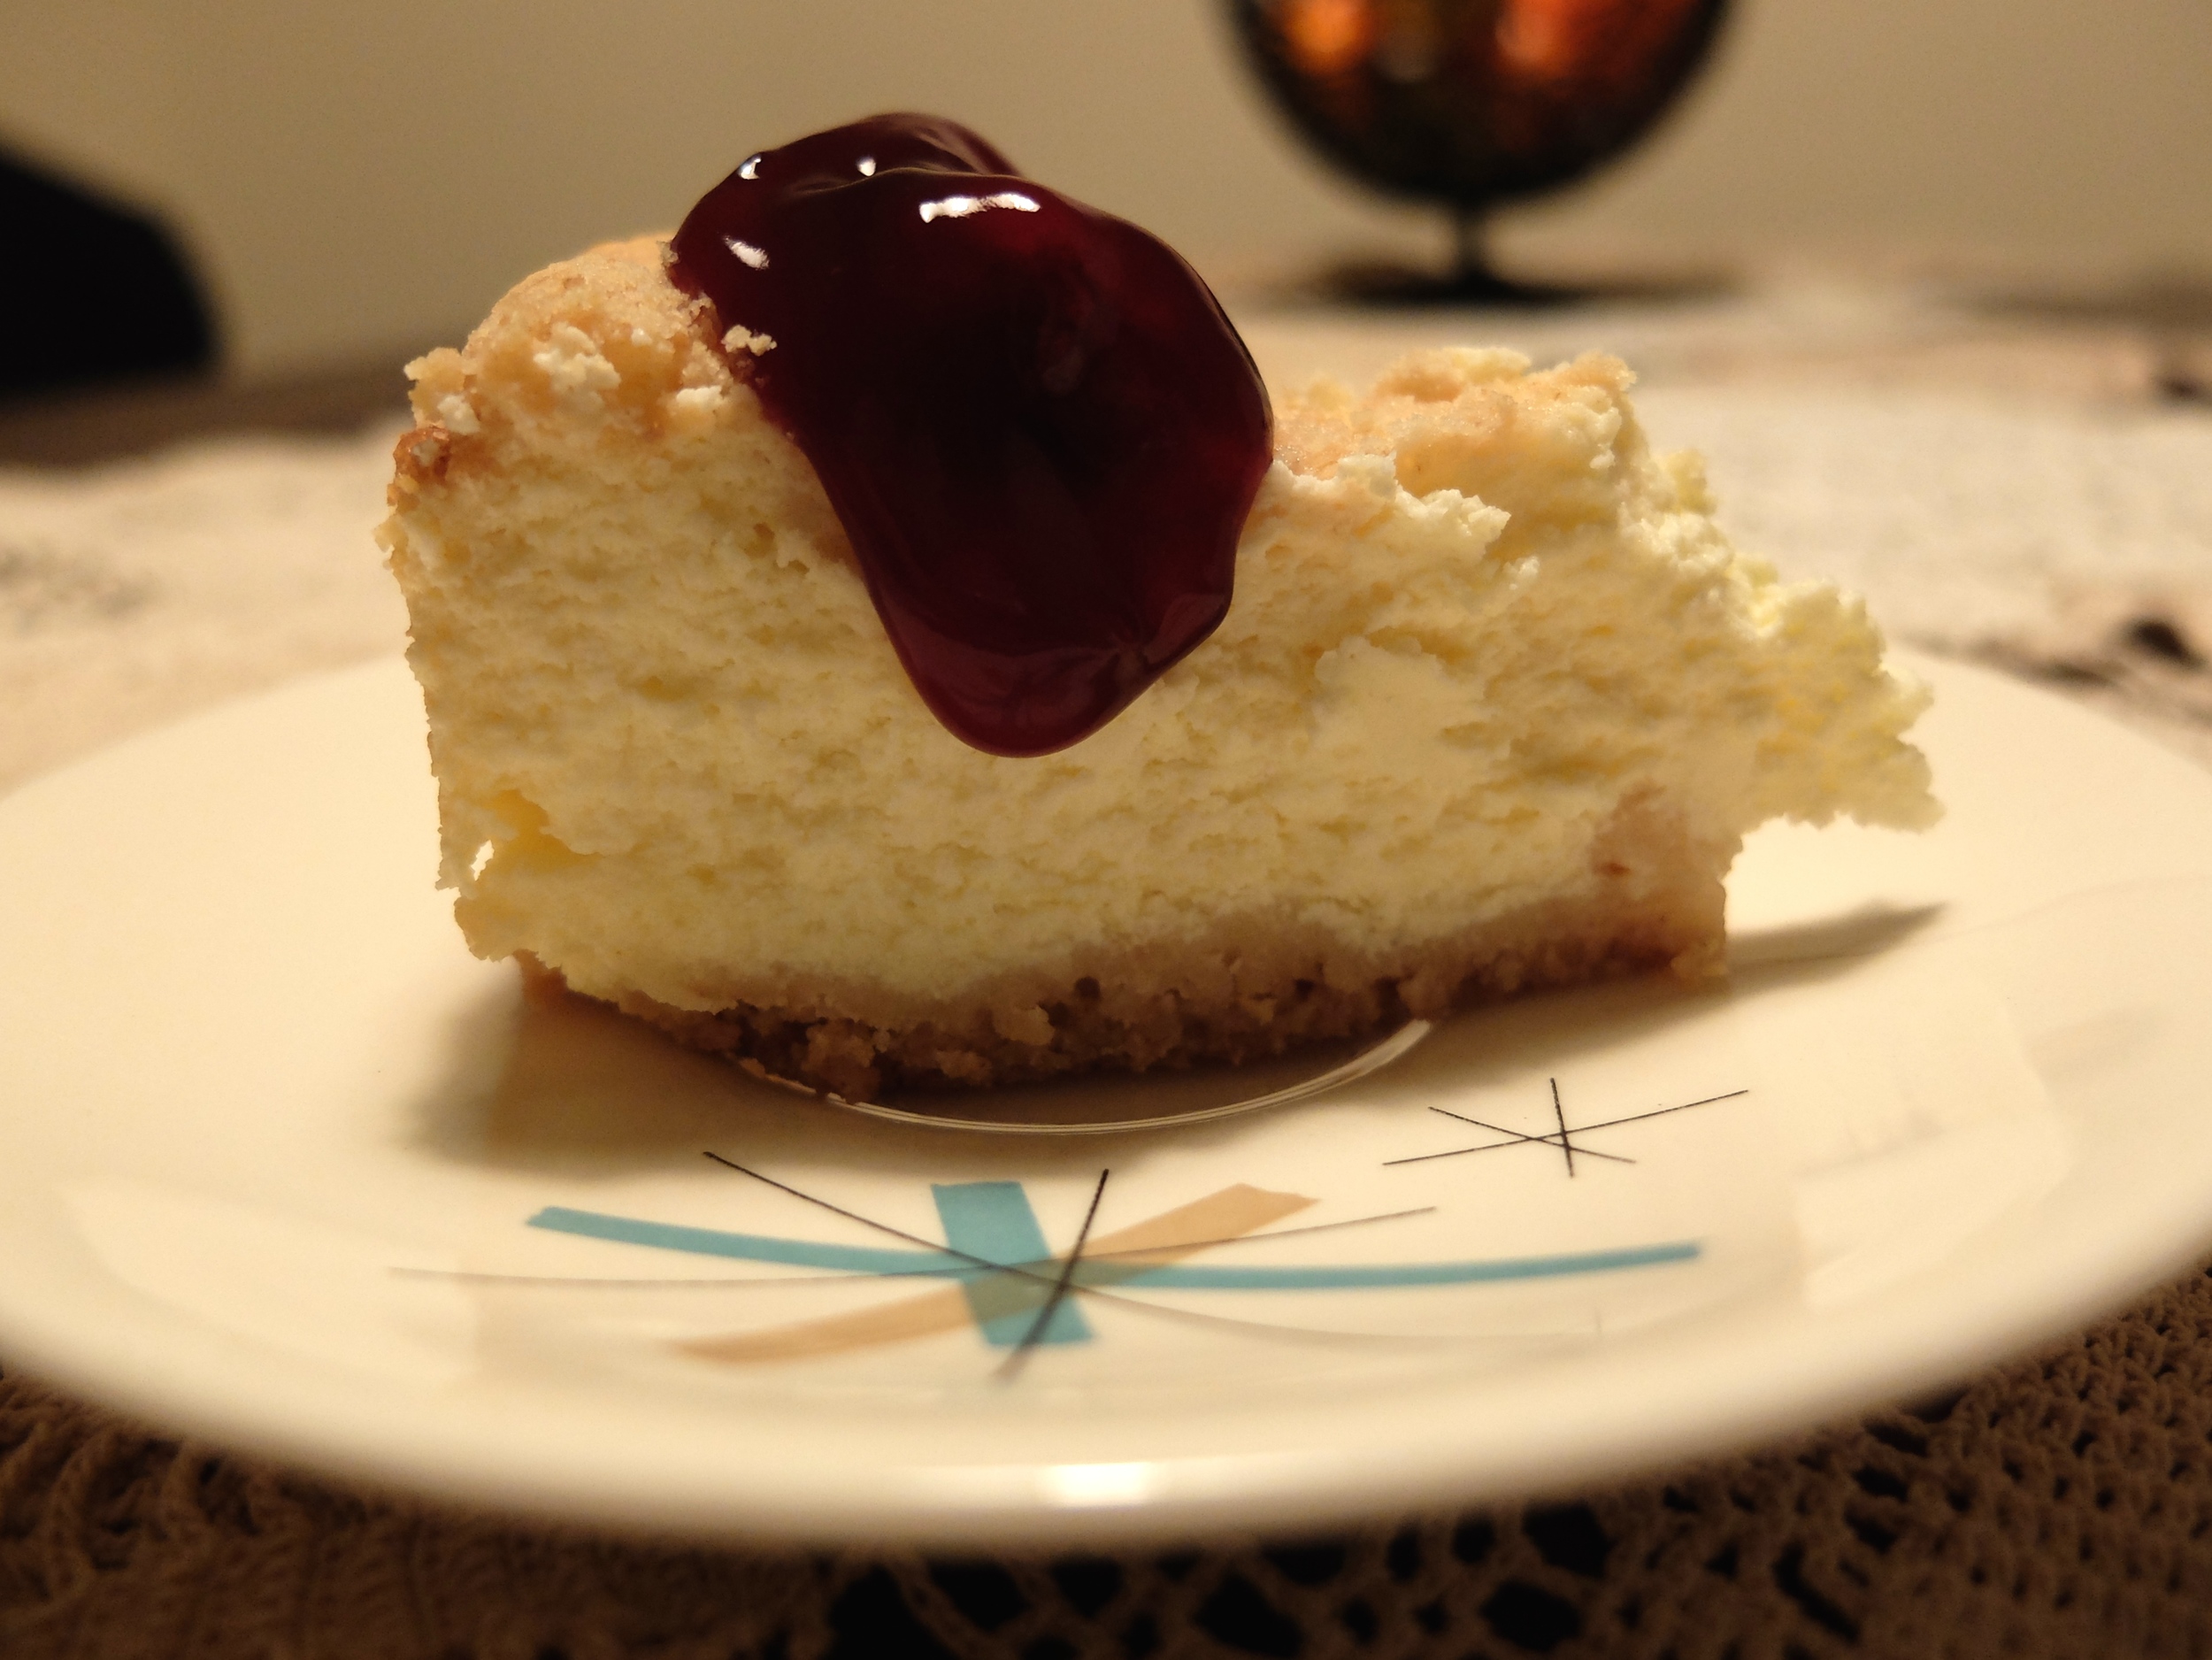
However, it was still worth it, because this sucker was delicious. (Oh, and I finally found pie filling at an international grocer, so I'd be lying if I said I didn't eat my share of this topped with cherries. I'm sure Eleanor is glowering down on me from Heaven, but hey: a girl can't make one cheesecake a month without getting sick of plain ones!

This is the most worn-out, dripped-on, dog-eared recipe I've yet come across in the box, so I know Eleanor agreed with me: make this cheesecake when you need a break from the most taxing parts of your everyday life (pun intended).

The verdict:

4 spoons out of five. If I was ranking on ease and flavour alone, I'd have to give it a five, but alas, appearance figures into the mix here, and this cheesecake slumped and cracked like I've never seen before, so... a spoon is deducted accordingly. However, the uniqueness of having a top and bottom crust combined with the creamy-but-still-light flavour makes me think this might be the one most worth perfecting.

The recipe:

Double-Crusted, Lightweight Cheesecake

The ingredients:

The crust:

1 ½ c zweiback, digestive, rich tea, or graham cracker crumbs, ground very fine and divided
2 tbsp sugar (if using zweiback. Otherwise, cut this to a scant 1 tbsp)
3 tbsp melted butter

THE FILLING:

16 oz cream cheese
1 c sugar
5 eggs, divided
16 oz sour cream
1 tsp vanilla
1 tsp lemon juice

CRUST:

Mix together sugar, butter, and 1 c crumbs, then press firmly into bottom of springform pan.
Reserve remaining ½ c crumbs for top crust.


FILLING:

Bring cream cheese to room temperature.
Once cream cheese is ready, preheat oven to 148C/300F.
In a large mixing bowl, beat egg yolks.
Add cream cheese and sugar and mix well, then add sour cream, vanilla, and lemon juice.
(Cream cheese should be soft enough that you can do this by hand-- if you use a mixer, make sure to use the lowest speed)
Set aside mixture, and in a separate bowl beat egg whites until very stiff.
Fold egg whites into cream cheese mixture gently until mixture is smooth. (This will take 3-5 minutes if working by hand. Mine still had bubbles in it, but all lumps were gone).
Pour into prepared pan and top with remaining crumbs.
Bake 1 hour, then, without opening the door, turn oven off and leave for another hour.
Open door and leave for a third hour.
Remove from oven and allow to cool thoroughly before removing sides of pan.

Broccoli and Cauliflower Casserole

Every time I gather the ingredients to make a recipe from the box that I think is going to be terrible, I am inevitably surprised when it turns out delicious. (Even the French Pudding, I'm embarrassed to say, was good enough to eat at least one serving.)

But when I assembled the ingredients for “Two Vegetable Casserole,” a recipe from my mom to Eleanor, I was convinced this would be the end of my winning streak. How convinced was I? So much so that I had a frozen pizza stashed in the freezer, just awaiting its turn in the spotlight if I couldn't make this casserole into something edible.

But I should have known: my mom is a pretty awesome cook, and this recipe did not disappoint-- despite the fact that it has a quarter of a cup of mayonnaise in it.* (I credit at least part of her cooking skills to the fact that my brother and I flat refused to eat onions, mayonnaise, or tomatoes until we were well into our teens. We taught her to be creative with her recipes, I guess?)

We love roasted veggies in this house, but it's easy to get stuck in the rut of “toss with olive oil, salt, pepper, and lemon juice and roast at an unreasonable temperature for 20 minutes.” So it was nice to give this recipe a try: roast veggies form the base of it, but they're dressed up with a creamy sauce and finished with an unbeatable crunch from the bread crumbs sprinkled over the entire thing. This is vintage food at its finest, but since Judson and I were barely children when casseroles were the ubiquitous solution for dinner, this is a totally new frontier for us and we love it.

I especially love that this recipe really does encompass Eleanor, my mom, and me, all in equal measure... and hey, it might not be the healthiest meal ever, but if you think of it as a low-fat broccoli soup, it's still a win in our book. I guess the moral of this story is that you should always trust your mom's cooking, even when it sounds gross. (Except when she tries to feed you beef stroganoff, because seriously, Mom? Eww.)

The Verdict:

5 spoons out of five. This made the perfect amount to have as a main course with a small salad, plus enough for leftovers the second night... and it was so good, we were actually looking forward to the leftovers. (Pro tip: sprinkle some fresh crumbs over it if you have this for leftovers, and it'll taste even better than the first night!)

*I really hate mayo and I don't see the point of adding the unnecessary fat here. I also ran out in the middle of this recipe, so I used 1 part mayo and 1 part greek yogurt. I think you could easily swap the entirety for greek yogurt (or sour cream) and not miss it, so that's what I listed below. In addition, I bought the veggies for this at our local co-op, so I used fresh instead of frozen, which I recommend. As noted here, I also omitted the final 2 tsp of melted margarine that was supposed to be drizzled over the final product because we found it unnecessary. If you want to do it the real 1970s way, then go for it... but that's on you.

If you're reeeeeally awesome, you'll use asian-style  panko bread crumbs instead of crushed  Ritz crackers, which is, assuredly, what eleanor would have used.

If you're reeeeeally awesome, you'll use asian-style  panko bread crumbs instead of crushed  Ritz crackers, which is, assuredly, what eleanor would have used.

The recipe:

Two Vegetable Casserole

The Ingredients:

1 large head of broccoli (or 2 small ones)
1 medium-sized head of cauliflower
1 can cream of mushroom soup
¼ c greek yogurt
1 c grated extra sharp cheddar cheese
1 egg, beaten
Salt and Pepper
¼ c toasted bread crumbs

THE DIRECTIONS:

Preheat oven to 200C/390F.
Chop broccoli and cauliflower into large-ish bite sized florets.
Put veggies in a roasting pan or casserole dish and drizzle with olive oil, shaking to coat. (It doesn't matter if your veggies are in a single layer-- you basically just want to add the great flavour that roasting imparts without cooking them all the way.)
Roast 10-15 minutes until you start to see brown bits but veggies are still crisp.
Remove from oven and turn temperature down to 176C/350F.
In a separate bowl, combine soup, yogurt, cheese, beaten egg, salt and pepper and blend well.
Pour soup mixure over vegetables and sprinkle evenly with crumbs.
Bake for 20-30 minutes.

Serves 4 as a main course with a side salad, or 6-8 as a side dish.

Triple Layer Cookie Bars

Have you ever cooked something with a really specific idea of what you were making, only to have it come out as a completely different recipe? I thought this recipe was going to be the ubiquitous but multi-named “Seven Layer Bars,” “Magic Bars,” or “White Trash Candy” that I grew up eating at every party I ever attended in the state of Kentucky. I read the ingredients and assumed that's what the end result would be, so I was completely surprised when it turned out to be a recipe for something significantly different, though no less good.

So what is this a recipe for, exactly? It's sort of like a chewy, dark-chocolate covered macaroon, these bars manage to be sweet without crossing over into cloying because the mix of flavours and textures is so perfectly balanced: salty crust, sweet filling, bitter chocolate topping. The perfect blend. If you were serving these at a party, I'd cut them into truffle-sized, single bite servings. If you're serving them at a girls' night where the goal is less elegance and more decadence, you could cut them into slightly larger, two or three-bite sizes.

I can imagine Eleanor and her friends snacking on these while they played bridge. They're easily transportable, they look incredibly fancy when cut up on a plate because of that smooth chocolate layer, and they're so decadent they'll make even the sweetest tooth swoon with happiness.*

These bars are rich, and, as we've already discovered, Eleanor's sweet tooth ran deep, so I guess that makes sense. Strangely, I haven't been able to think of an American equivalent, but they taste awfully similar to Millionaire's Shortbread-- a Scottish dessert comprised of shortbread topped with caramel and covered in chocolate. The good news is that this recipe is way easier than millionaire's shortbread because it doesn't require you to make caramel (always a plus in my book!), and it makes a ton, because you're gonna want to cut them small. Plus, they keep well in the fridge for at least a week (possibly longer, but that was when we ran out).

I usually don't pay too much attention to the type of butter I use in baked goods, but for this one you're definitely going to want to use salted butter. The slight saltiness in the crust offsets the sweetness of the other layers just perfectly and without it, I think these would cross into sickly-sweet territory. If you can get your hands on desiccated coconut instead of the usual shredded stuff, it might make the bars easier to cut into uniform cubes, but it also probably cuts down on the coconut texture/flavour that shredded gives, so if you're into that, go for shredded.

*I have no picture to show you of how fancy they look once they are cut, because I got distracted with how delicious they were as soon as we started cutting them and totally forgot to take a picture. Next time, friends.

The verdict:

5 spoons out of five. They're rich, delicious, and easy, they keep well, and the recipe makes a lot. What more could you possibly want?

Loose crumbs.

Loose crumbs.

Post-baking, pre-chocolate layer.

Post-baking, pre-chocolate layer.

Final Layer.

Final Layer.

The recipe:

Triple Layer Cookie Bars

The ingredients:

½ c salted butter
1 ½ c rich tea biscuit crumbs, or graham cracker crumbs
7 oz desiccated coconut
14 oz condensed milk
12 oz bittersweet baking chocolate
½ c creamy peanut butter

THE DIRECTIONS:

Preheat oven to 176C/350F.
In 13x9 pan, melt butter in oven.
Once butter is melted, sprinkle crumbs evenly over butter (no need to pack it down or try to stir it into a "crust," it will form on its own in the oven).
Top evenly with coconut, then condensed milk (tip: sprinkle the coconut and pour the condensed milk easily-- you're not gonna be able to level them out much after you add them to the pan without disturbing the bottom crust).
Bake 25 minutes until lightly browned (will be mostly dry but still sticky looking).
During last 5 minutes of baking, in a small saucepan over very low heat, melt chocolate with peanut butter, stirring constantly to avoid burning.
After bars are done baking, pour melted chocolate mixture evenly over hot coconut layer.
Chill thoroughly before cutting bars.
Store loosely covered at room temperature, or in the fridge if you're not going to eat them for a few days.

Yields 30-36 small bars, depending on size.