

Peanut Butter Cookies
/
When I was a kid, I hated peanut butter. I know this because my dad thought it would be funny to teach me to recite, on cue, a list of all the foods I didn't like. And then if someone ever asked me “Hey Blair, would you like some cole slaw?” I would just spout them all off without warning: “Don't like cole slaw, don't like mayonnaise, don't like peanut butter, don't like peanut butter crackers, don't like Tootsie Rolls, don't like spaghetti...” etc.
But then I grew up, my mom figured out a way to make PB&J appetising to me, and my grandpa introduced me to Reese's cups, which are still my favourite candy. In college, I was even known to have a spoonful of peanut butter for breakfast on my way to class, but somehow peanut butter cookies have always been low on my list. Maybe it's because they're somehow so often dry and crumbly instead of soft and decadent like their chocolate chip cousins. Maybe it's those weird fork marks on top? Or maybe it's just that, truth be told, when facing a tin of holiday cookies, I'd just rather go for something more reliably amazing.
That said, I strongly associate peanuts, if not peanut butter, with Eleanor (and rightly so, at least judging by how well-worn this recipe is). She always had a crystal dish of Planters nuts somewhere in her living room, and I was fascinated by the fact that there were just snacks available all the time in her house. (Also, I know they were Planters because she also had all kinds of Mr. Peanut memorabilia that must have come with the jars over the years.) I may not have liked peanuts, but I'd conquer that dislike if it meant I got to eat anything out of a crystal dish whenever I wanted to, especially if it was offered to me by a peanut wearing a monocle. So every time we visited, I'd sneak peanuts and think Eleanor was très glamorous.
But back to the affair at hand: I offered to make cookies for Judson to take to a game night with his friends, and when presented with the option between peanut butter cookies and oatmeal cookies, he chose peanut butter. (Since then, he's chosen three other desserts over oatmeal cookies, but I keep thinking I'll sneak them in one of these days).


I made him these peanut butter cookies, and it turns out they are awesome. I'm sorry, Eleanor-- I should have expected nothing less from someone who bought enough peanuts to be in the running as Mrs. Peanut. These are exactly what I've always thought peanut butter cookies could be, but never knew how to achieve: they're gooey, salty-sweet, and have a depth of flavour beyond just PEANUTS. Plus, they're somehow not overly greasy, which is also another personal pet peeve when it comes to anything peanut-related. They're incredible when eaten warm out of the oven (with a glass of milk, please!), but they're also delish at room temperature, even for several days after making them. Plus, they're easy and classic... though I clearly haven't figured out how to make those fork marks yet.

The Verdict:
4 spoons out of five. These are the best peanut butter cookies I've ever had, but I'm trying to reserve 5 spoon ratings for recipes that are more unique than this one. But again, let me reiterate: best peanut butter cookies I've ever had. Make these for a party, make these for a friend, make these for yourself and you'll see... just make sure whoever you make them for doesn't have a peanut allergy first.
The recipe:
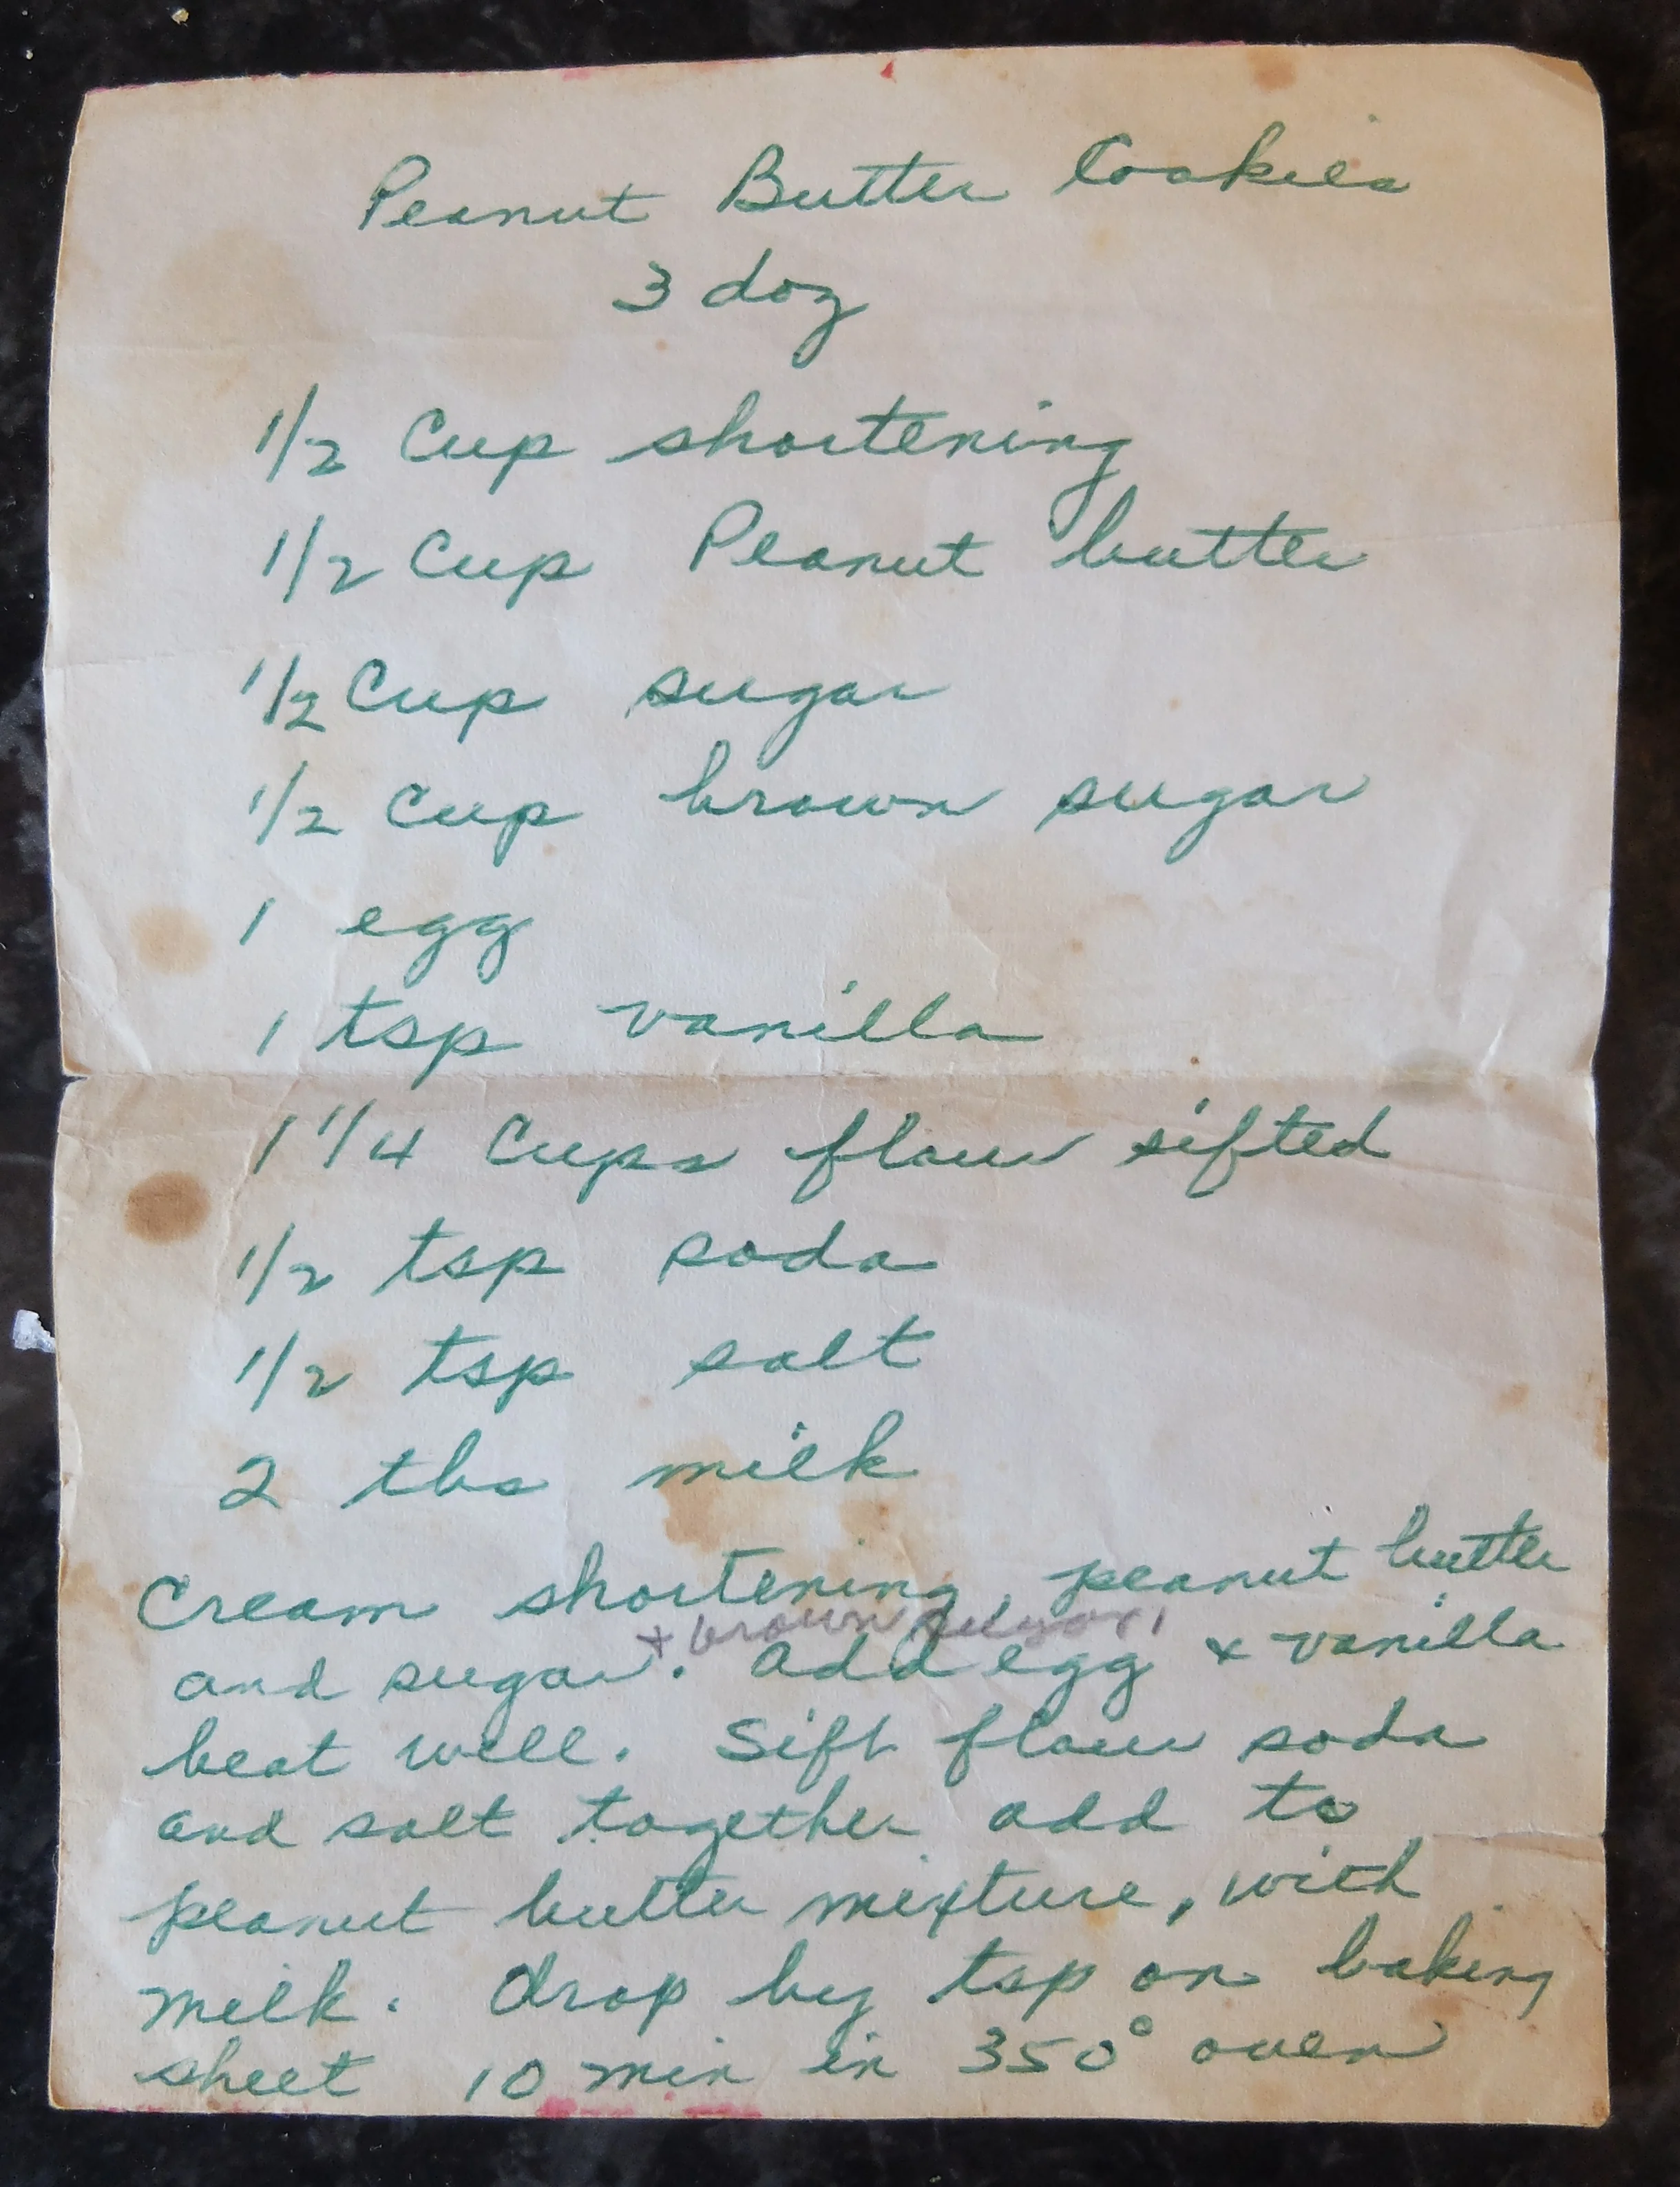
Peanut Butter Cookies
The ingredients:
½ c shortening or Stork
½ c peanut butter
½ c sugar
½ c brown sugar
1 egg
1 tsp vanilla
1 ¼ c flour, sifted
½ tsp baking soda
½ tsp salt
2 tbsp milk
THE DIRECTIONS:
Preheat oven to 350F/176C.
Cream shortening, peanut butter, and both sugars in a mixer.
Add egg and vanilla, beating well to incorporate.
Sift flour, soda, and salt together, then add to peanut butter mixture alternately with milk.
Drop by rounded teaspoon onto ungreased baking sheet and cook 10 minutes or until flattened and slightly brown around the edges.
Yields 2 dozen cookies, not 3 dozen as listed on Eleanor's recipe... unless you make them much smaller.


